
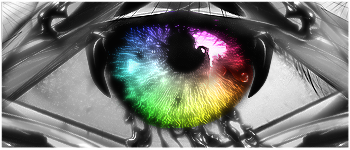
Today we'll be making this tag.
What you'll need:
http://i167.photobucket.com/albums/u142/raven7590/images-miscellaneous-2006-eye-500x5.jpg
http://i167.photobucket.com/albums/u142/raven7590/help3wh3.png
http://i167.photobucket.com/albums/u142/raven7590/wireframe2.png
http://i167.photobucket.com/albums/u142/raven7590/wetsand.png
http://i167.photobucket.com/albums/u142/raven7590/1diff.png
http://i167.photobucket.com/albums/u142/raven7590/c4d_5.png
http://i167.photobucket.com/albums/u142/raven7590/c4d_4.png
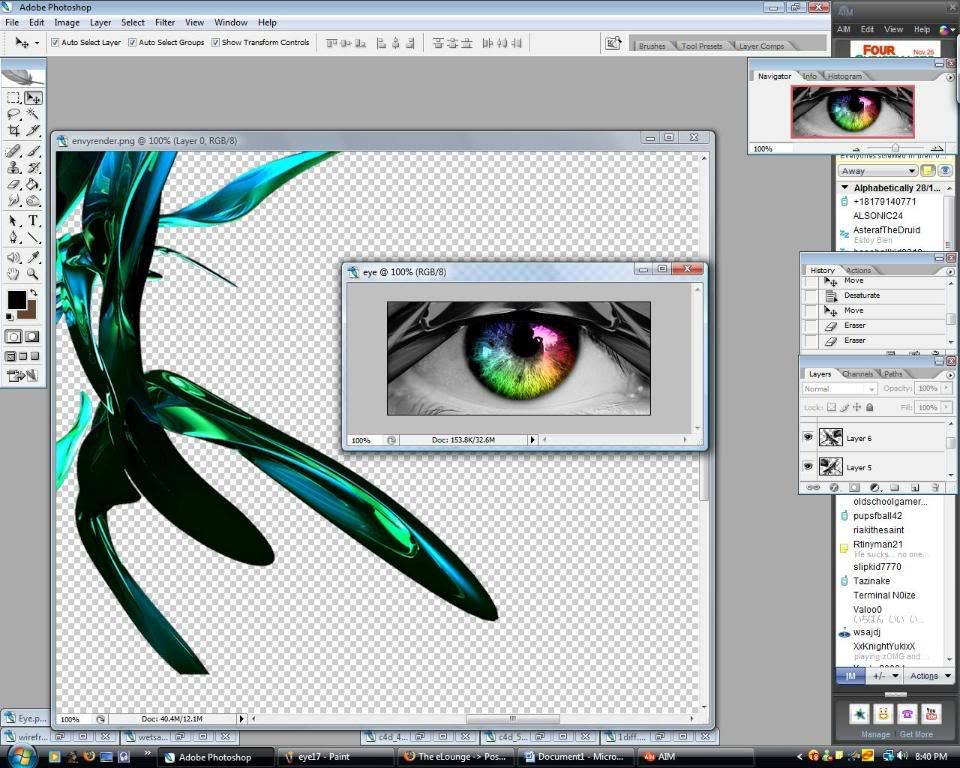
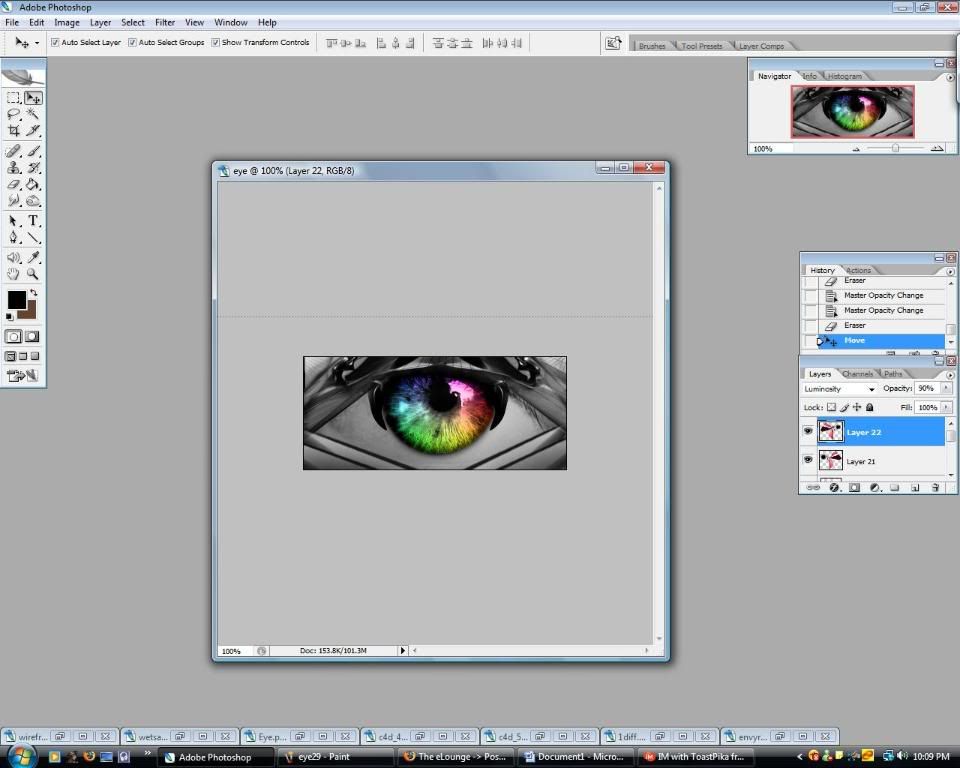
Ok open up Photoshop/Gimp, whatever works, and open a new document (CTRL + N) The size I used was 350x150
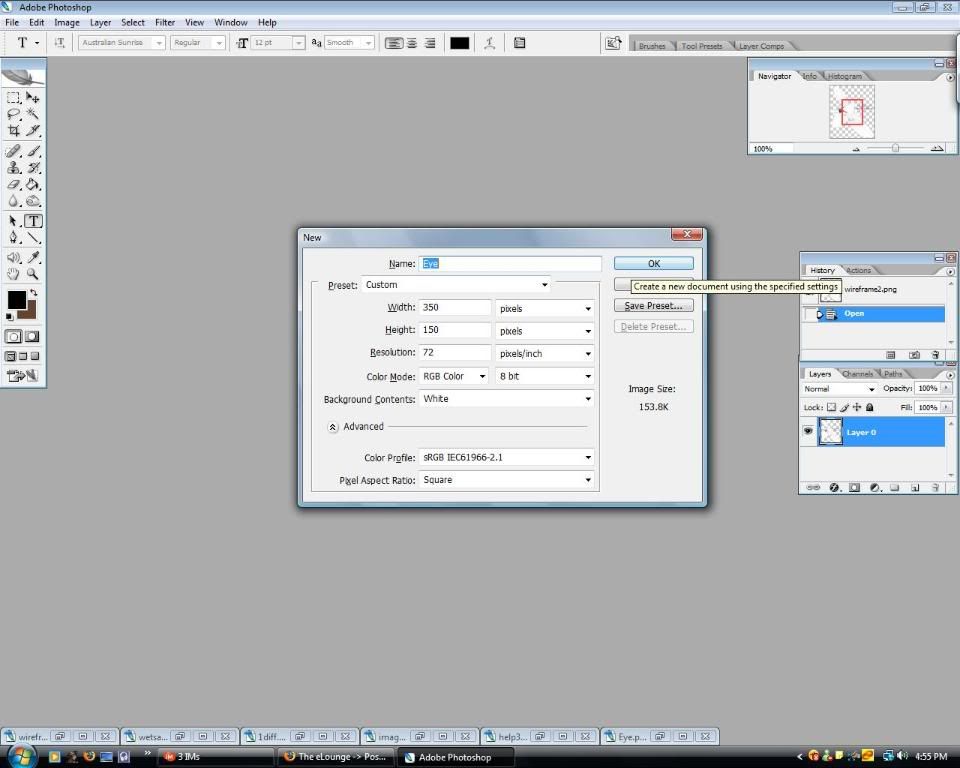
You can name it whatever you want I just named mine Eye

Now take your stock and move it into your document.
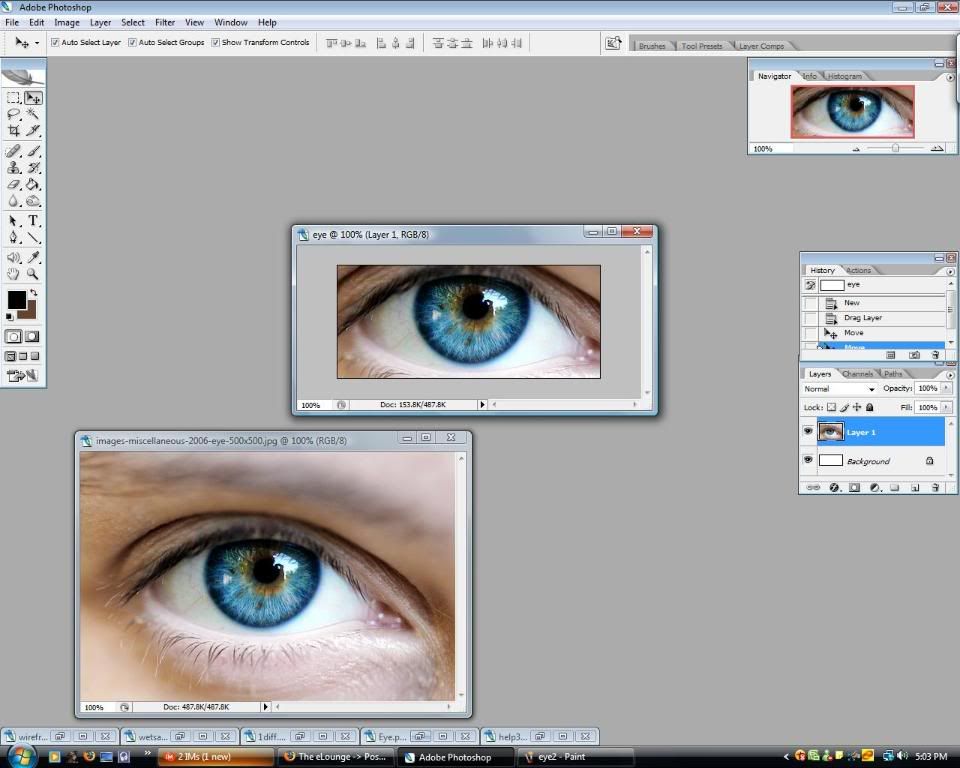
I thought it looked ok as it was, so I didn't re size it. It's up to you though.
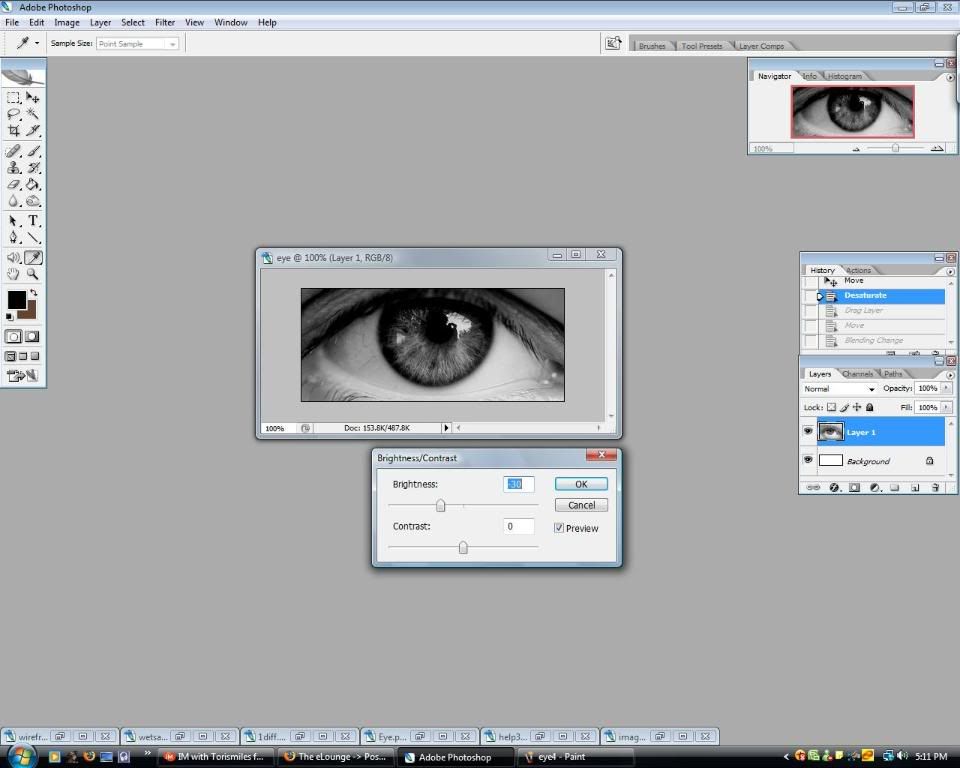
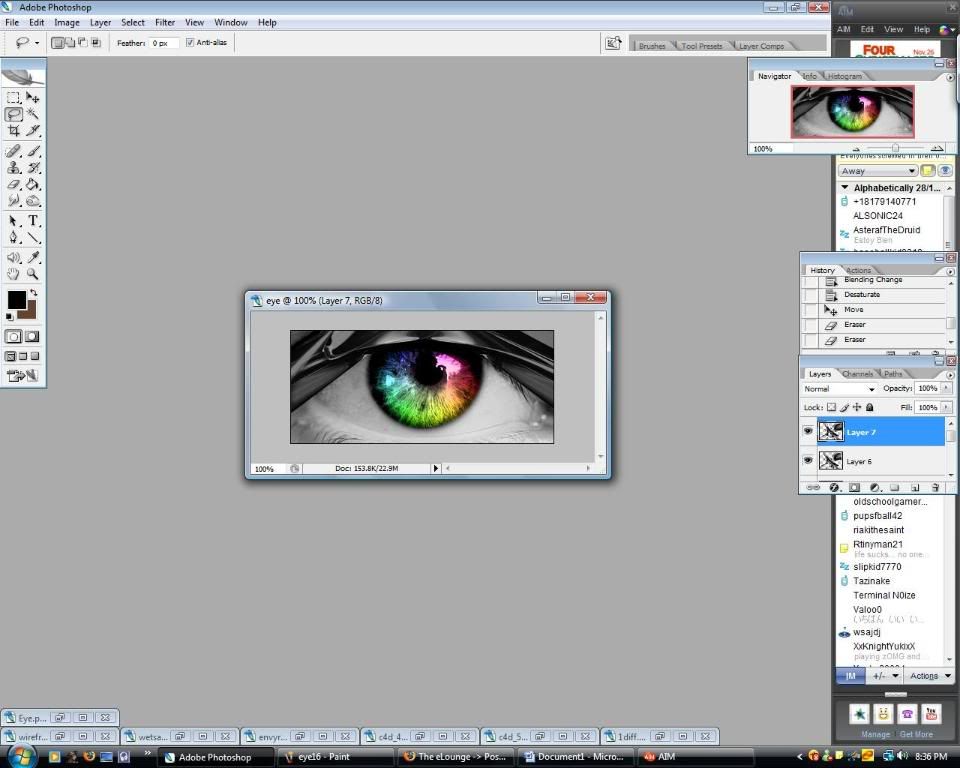
Desaturate it to make it black n white. (Image > Adjustments > Desaturate) or (SHIFT + CTRL + U)
It should now be black and white.
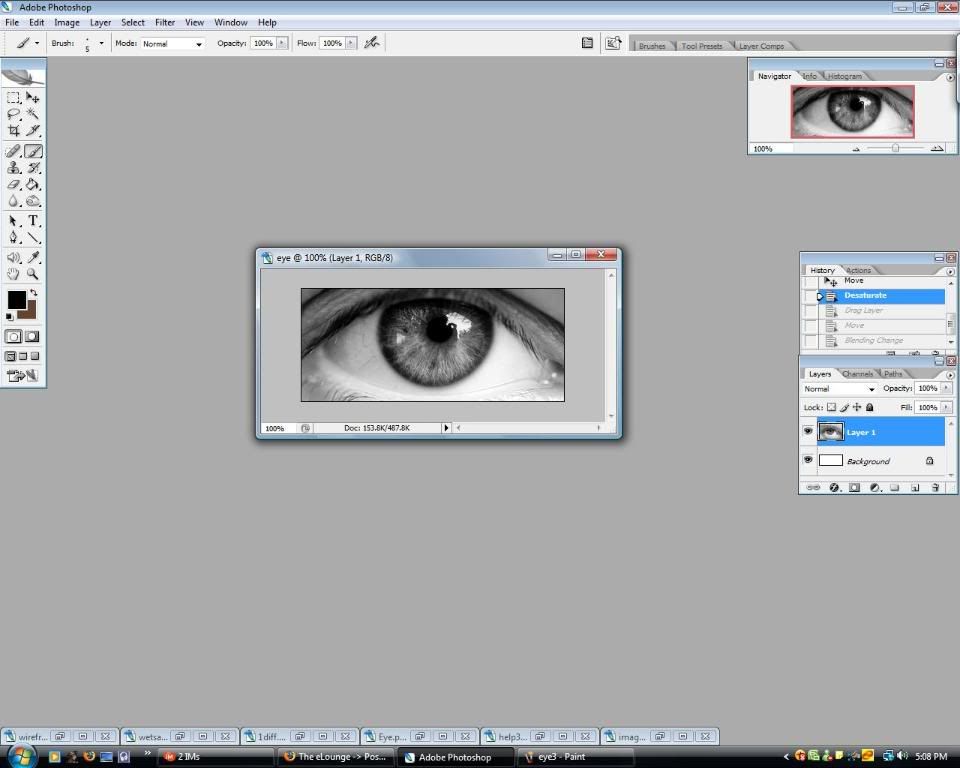
I adjusted the brightness a bit but you don't really have too.
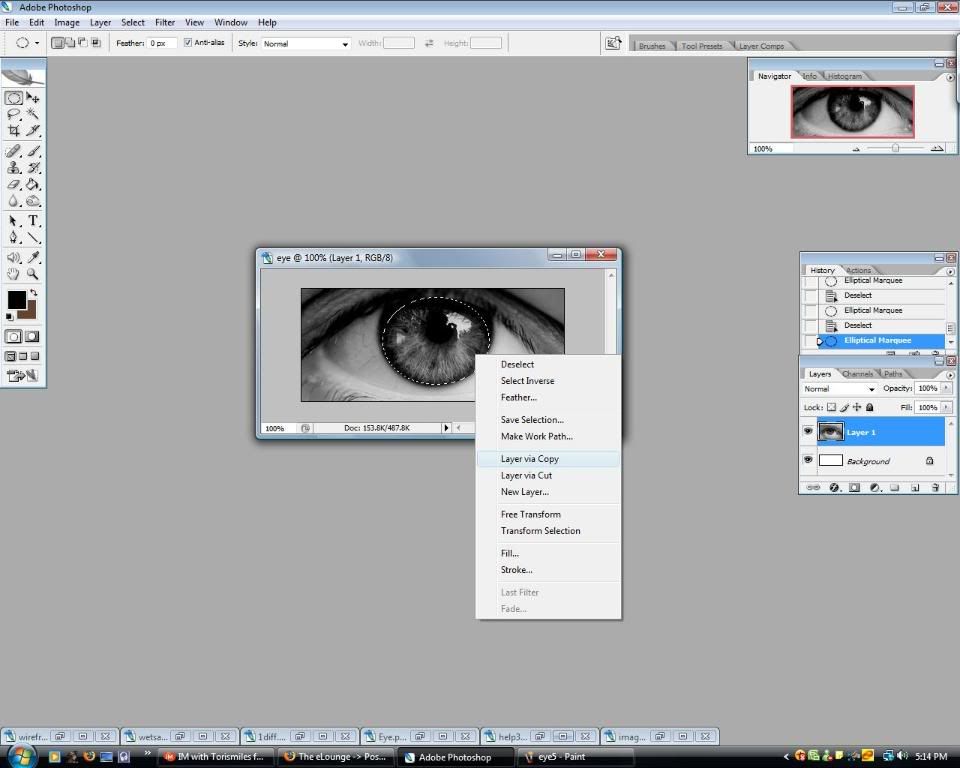
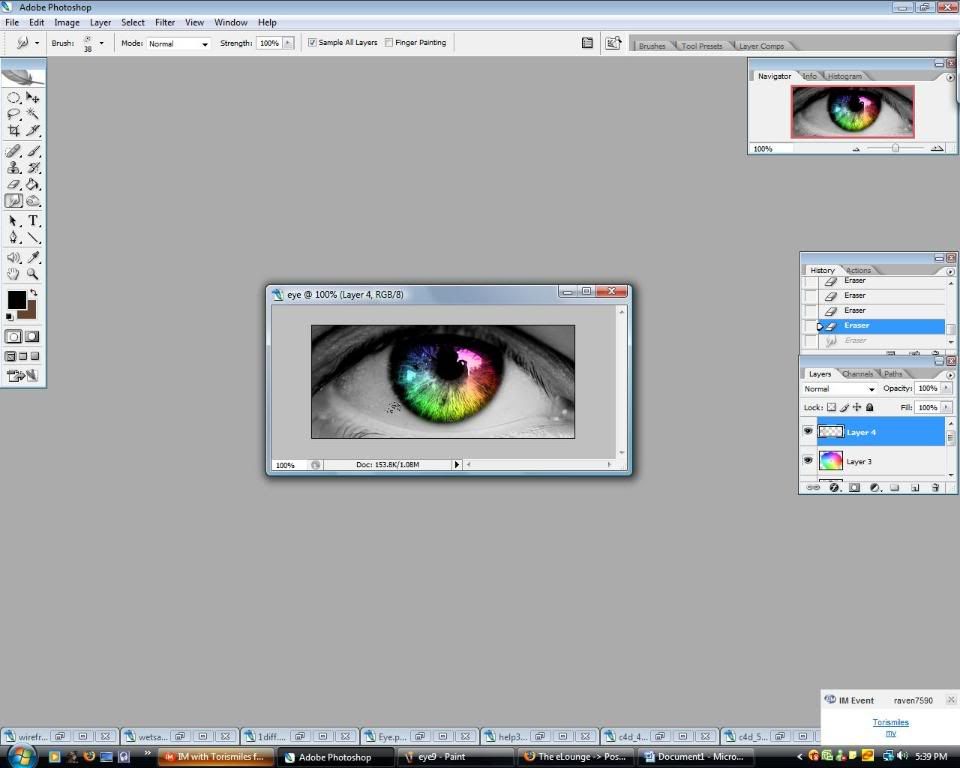
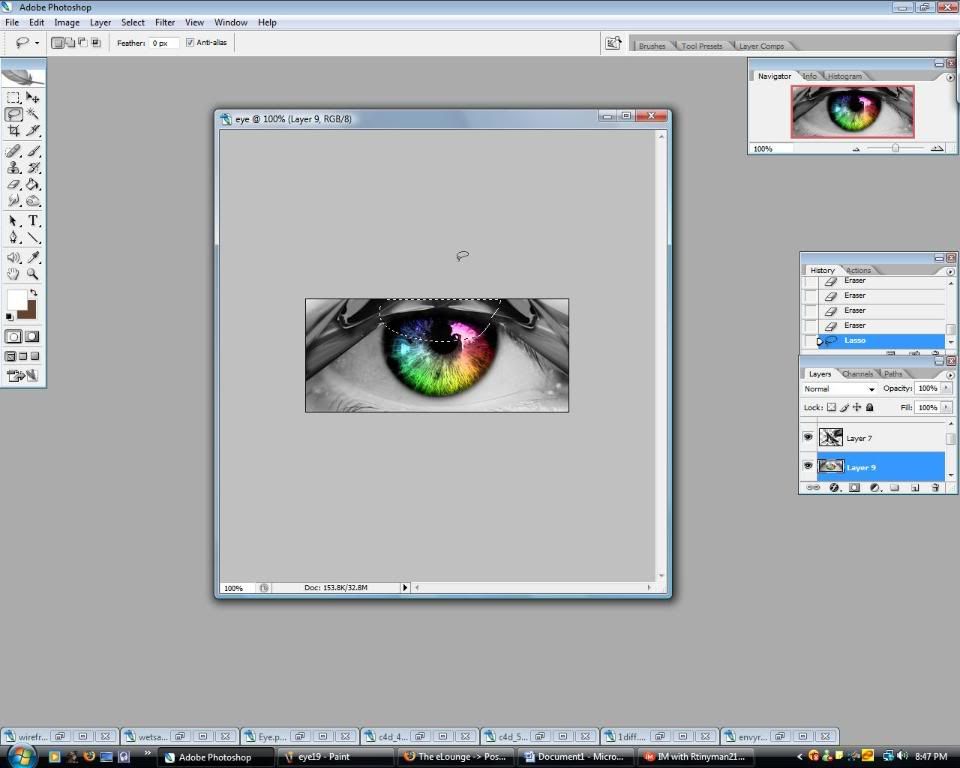
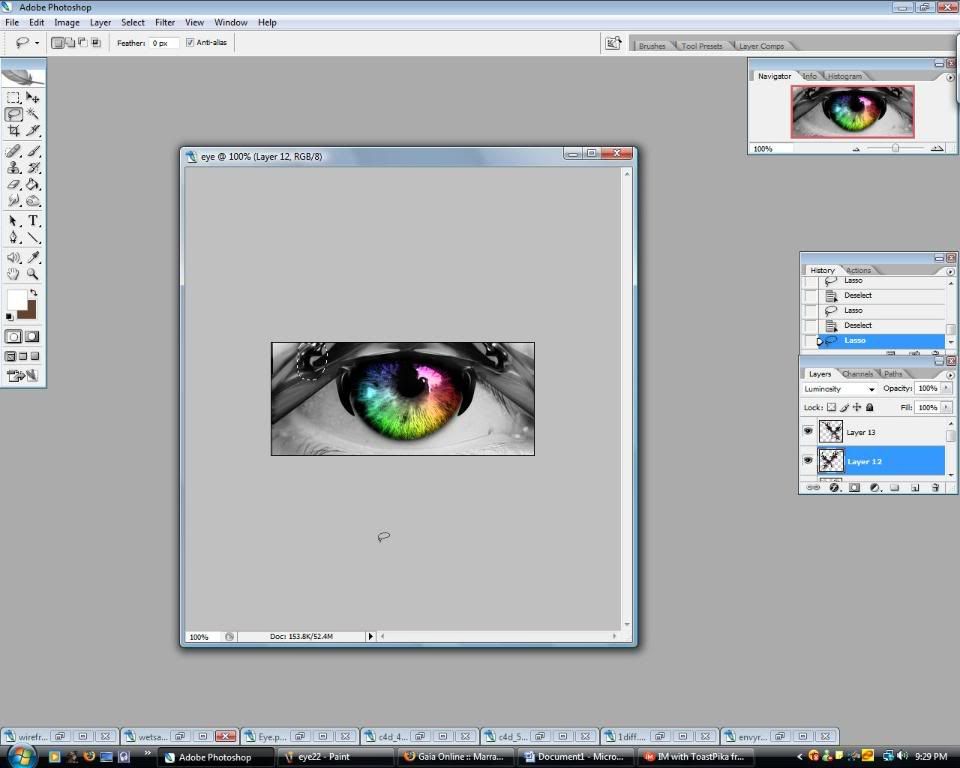
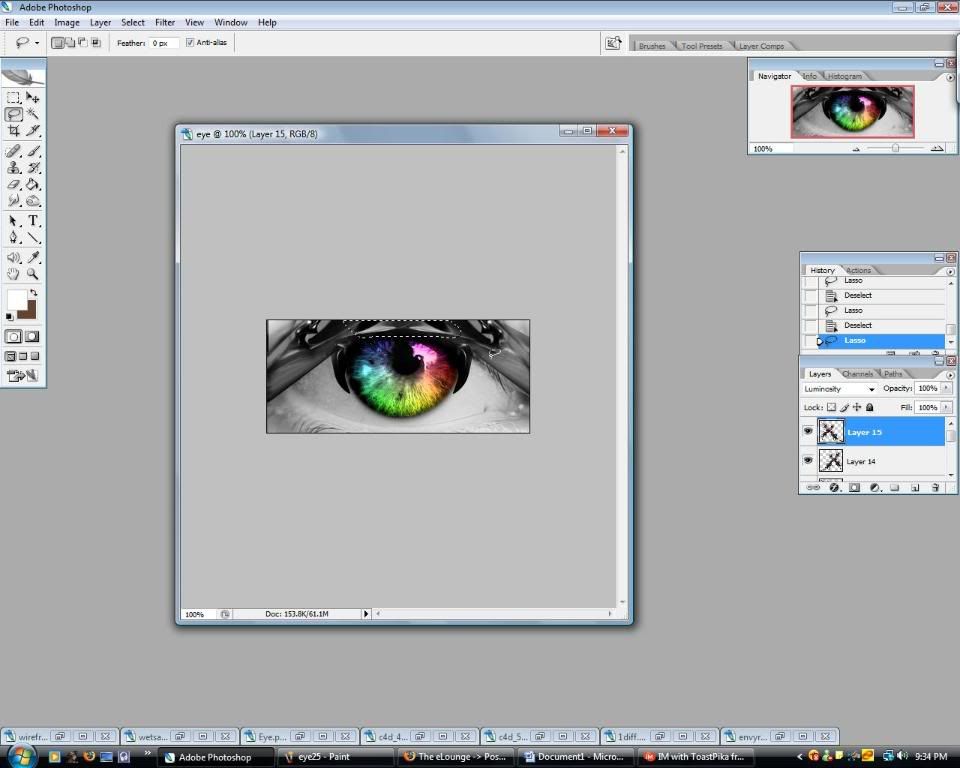
Now draw a circle around the iris with the elliptical marquee tool and copy and paste it into a new layer.
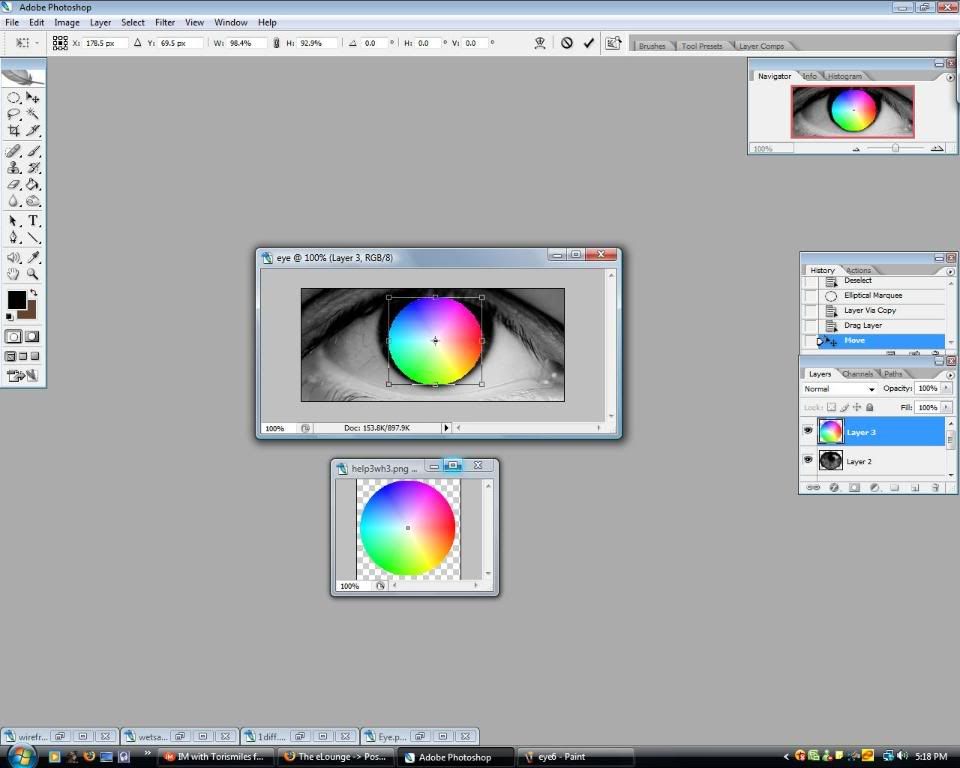
Now take your color wheel
http://i167.photobucket.com/albums/u142/raven7590/help3wh3.png
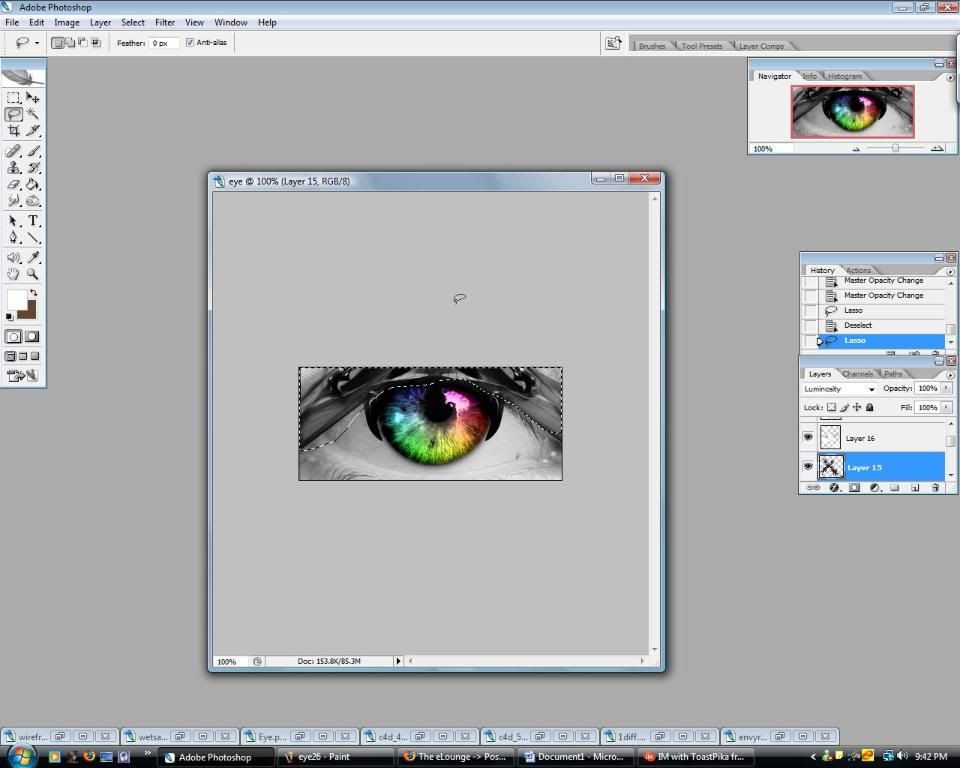
And drag it onto the iris. Re size it if you have too so its roughly the same size as the iris. I made it a little bit bigger just to make sure I covered the entire iris.
Set the colorwheel layer to Overlay.
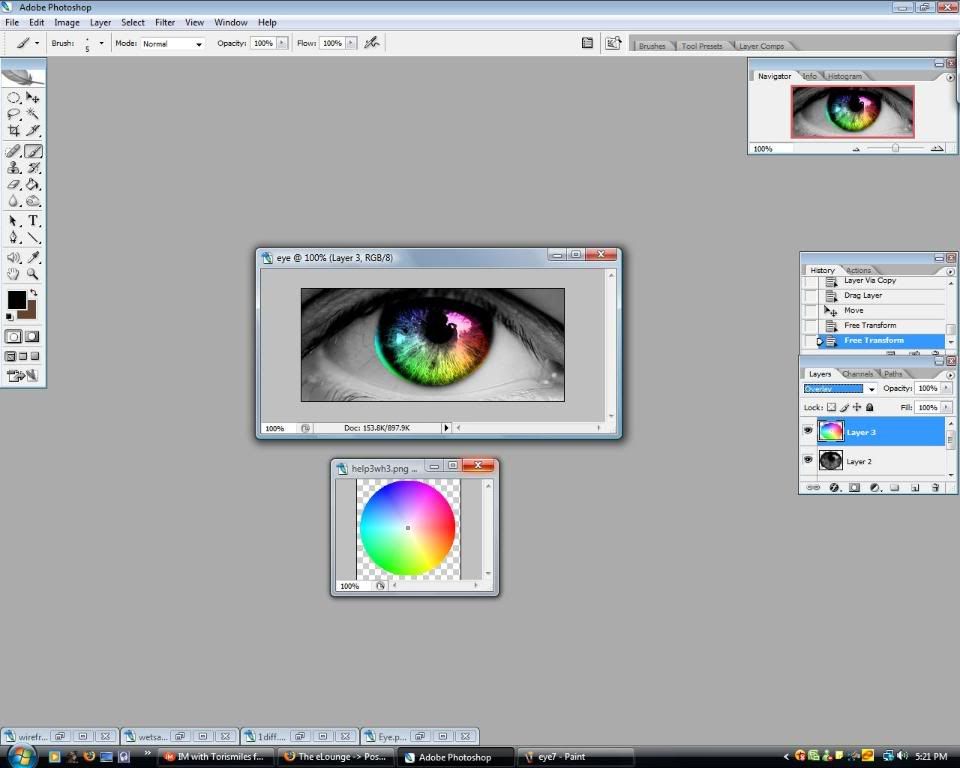
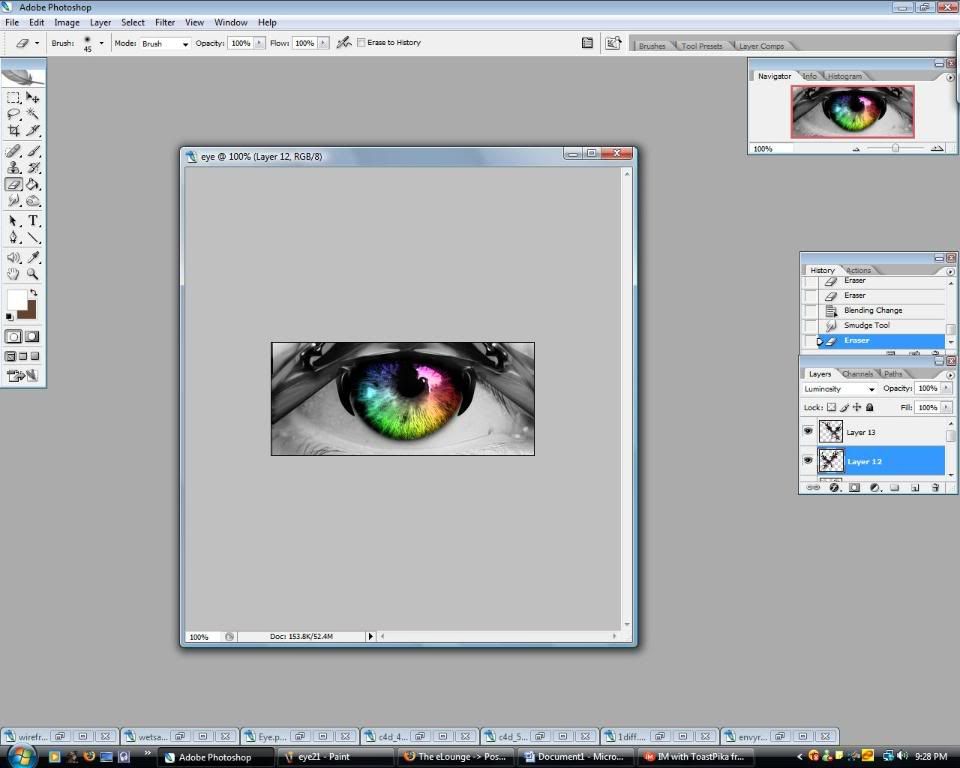
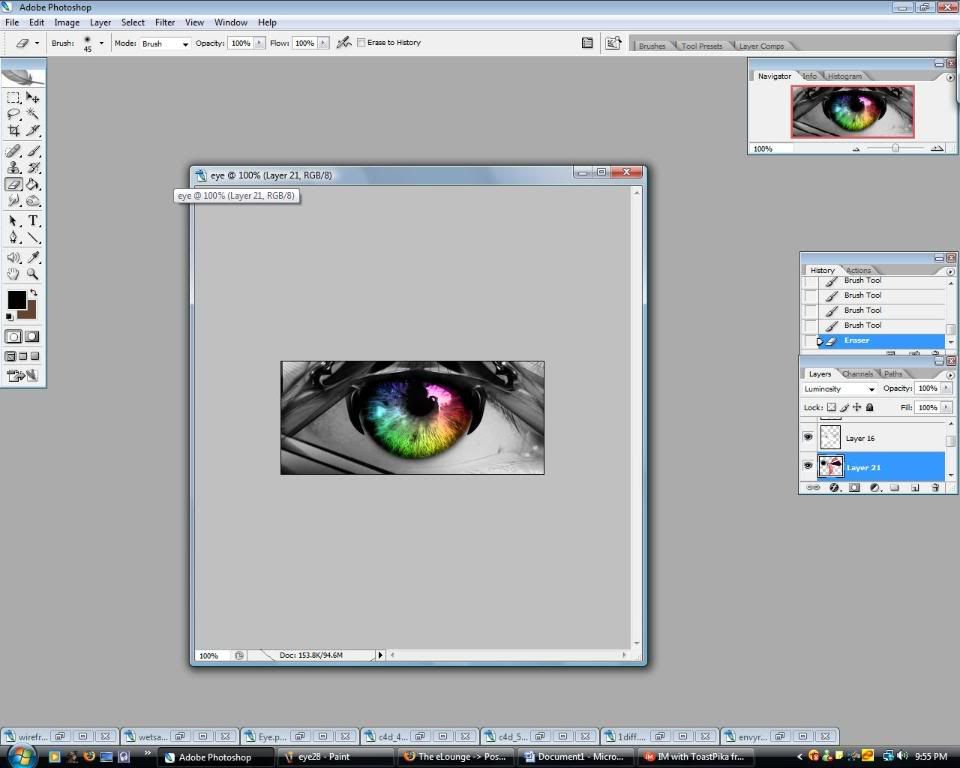
Now there is some leftovers from the colorwheel so use your eraser tool and remove the unwanted edges. I used a 13px soft brush.

I did a little smudge brushing and a ripple filter to clean up the bloodlines inside the eye. This is optional though.
Alright now we have our basic image down so lets make it look cool. Get out some nice C4D's that you think would work here, or just use the ones I did razz
First I'll be using this one:
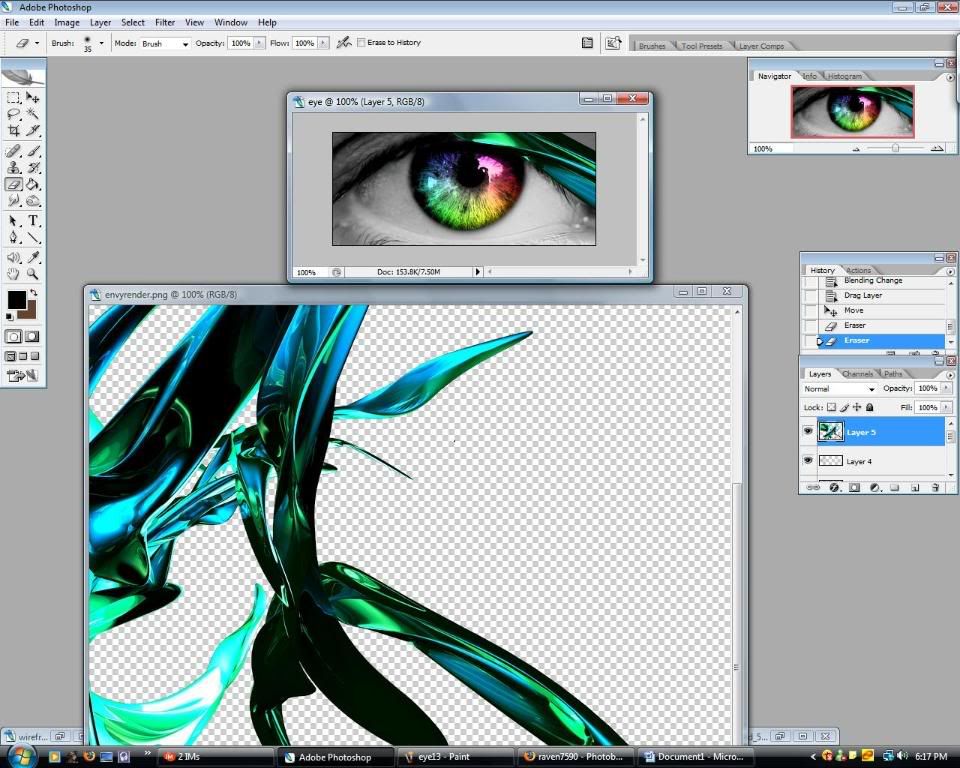
http://i167.photobucket.com/albums/u142/raven7590/envyrender.png
You won't need to re size this at all for the upper eyelids.
Now using the Rotate Canvas (Image > Rotate Canvas), were going to turn the canvas into an angle that best matches that of the eyelid.
I found that Rotate Canvas Vertical, puts it in the perfect position for the upper right eyelid.
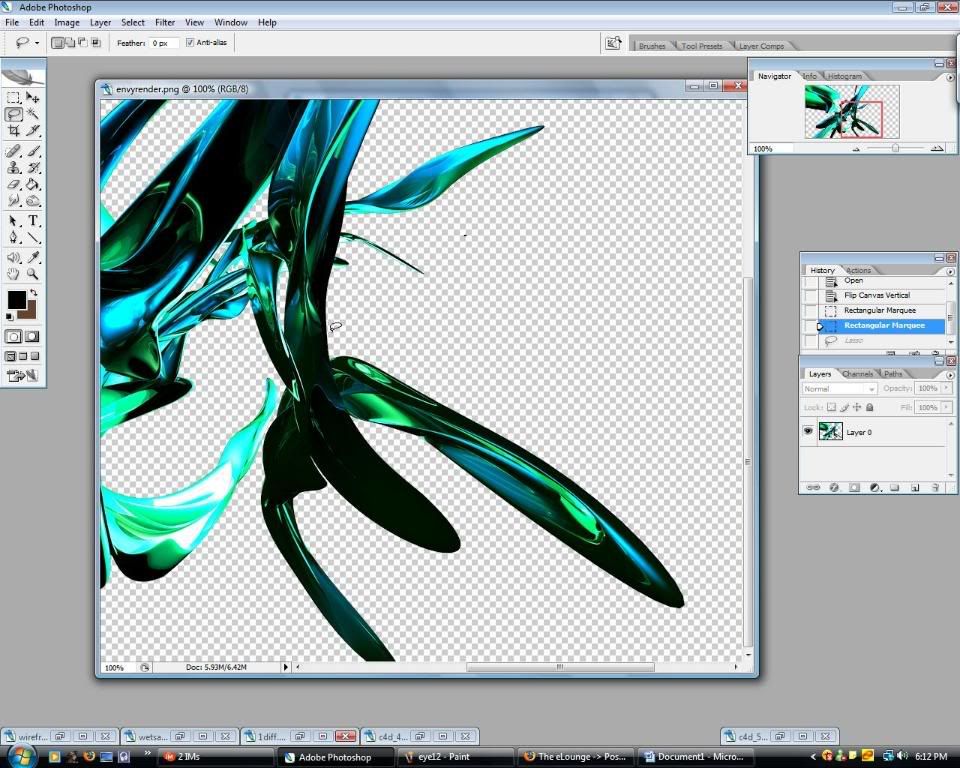
Were going to be using this part as the upper eyelid btw.
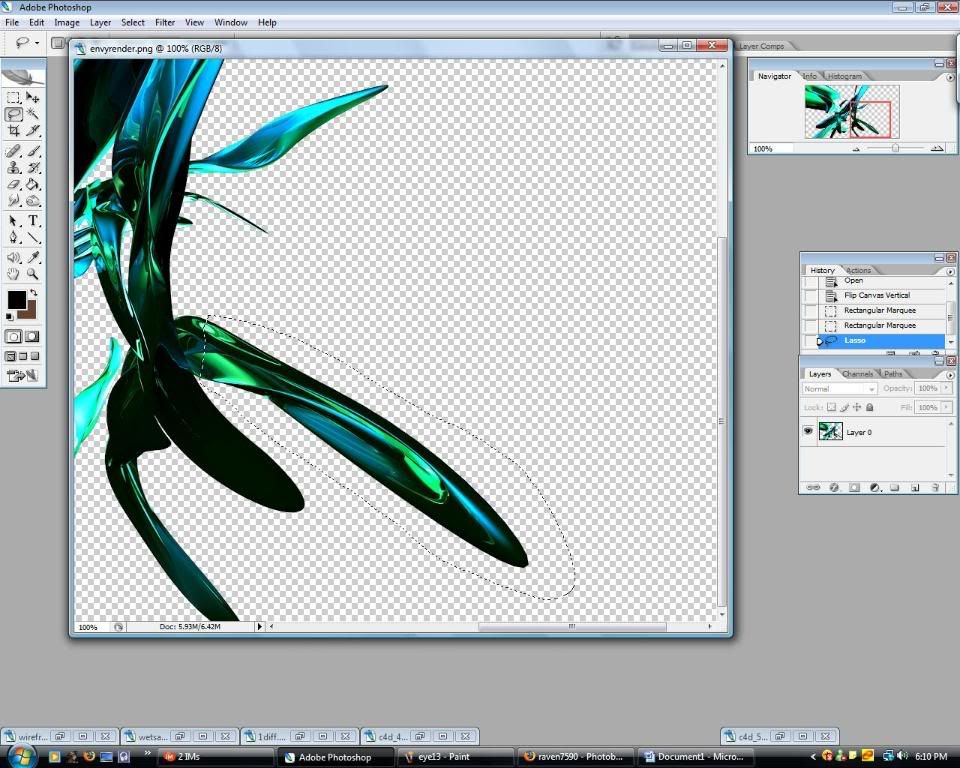
Now move the c4d onto the upper right eyelid.
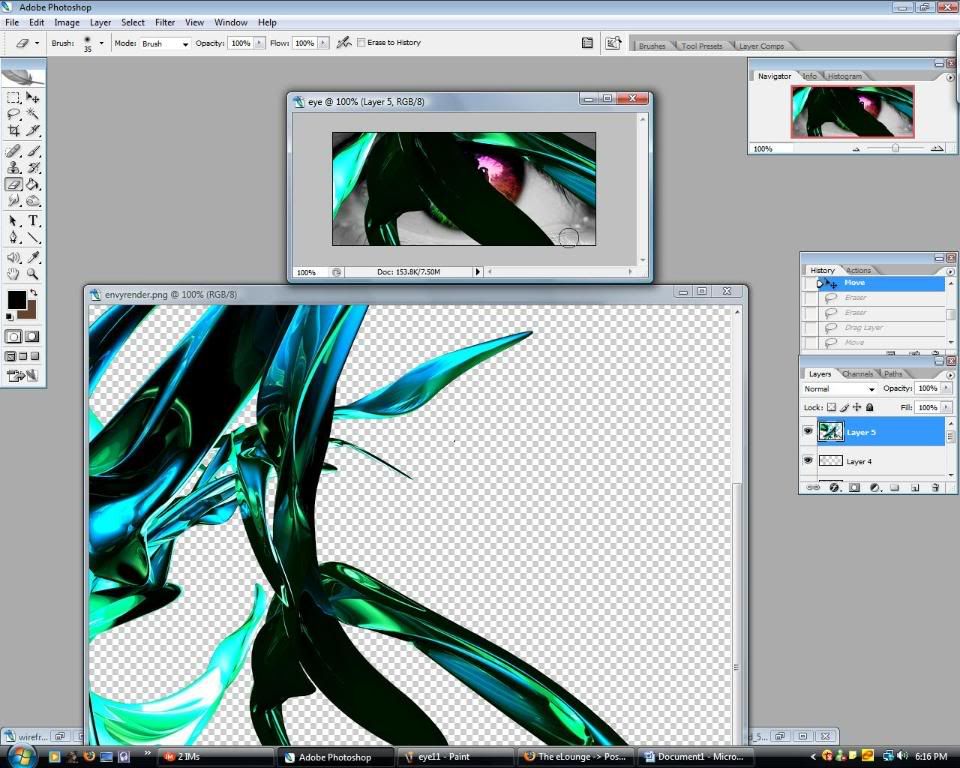
Erase any unwanted stuff.
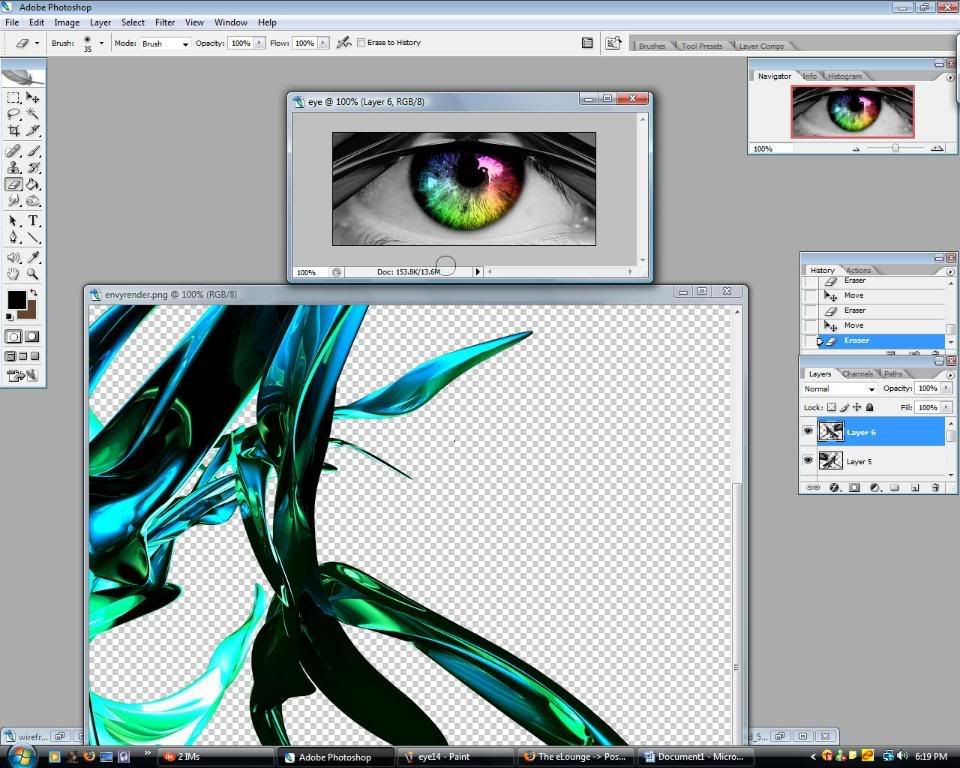
Rotate canvas Horizontal and you'll have it in position do to the same thing to the left side. Don't forget to desaturate these two c4d layers.
This is what the outcome of these steps.
Find another shape in the c4d that goes along with the eyelid, and continue. I used this part.
I placed this right on top of my previous c4d and erased the black boring bits.
Do the same thing to the other side by rotating the C4D.
I thought it looked pretty dark, so I took a 200px white brush, and brushed some spots around the sig for some lighting.
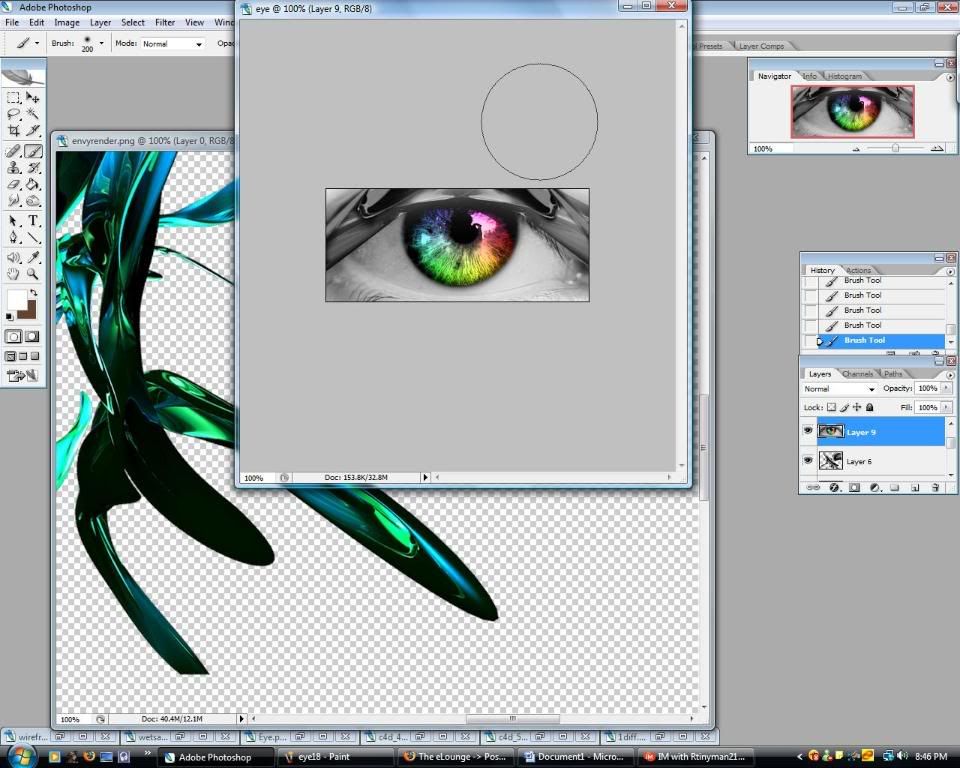
I erased the spots that I didn't like, in this area.
Using this part-
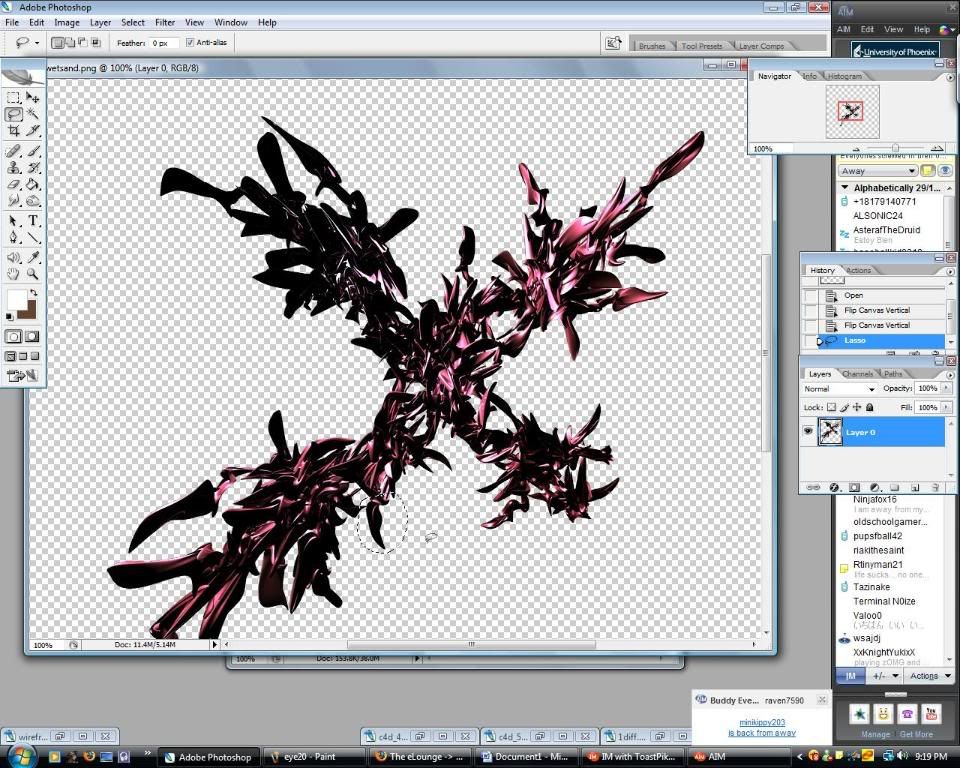
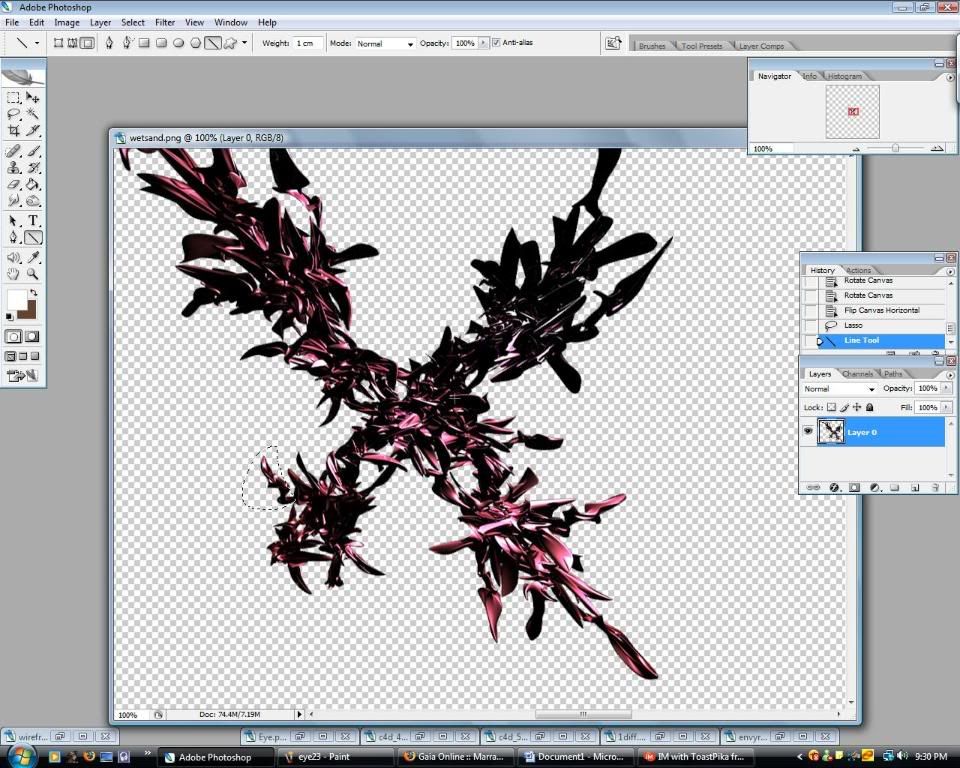
-of the wetsand c4d,
http://i167.photobucket.com/albums/u142/raven7590/wetsand.png
I made the two spikes on each side of the iris.
I also made these things,
using this part of the wet sand c4d.
I added two more spikes using this piece.
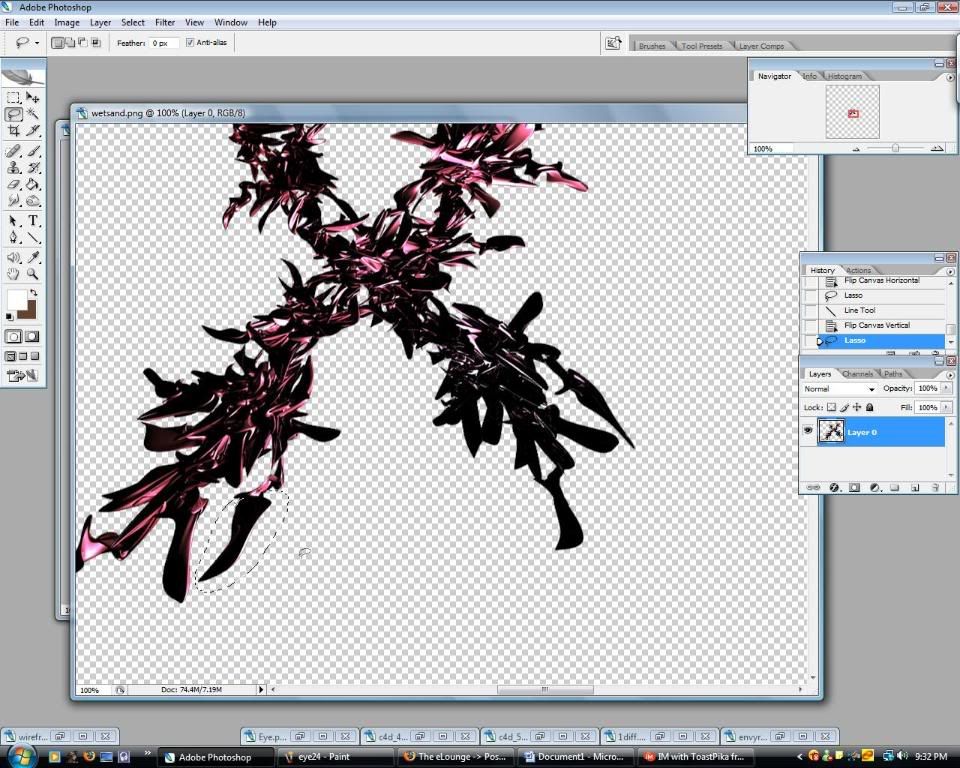
And I placed them here.
Alright for a last bit of detail work before moving on to the lower eyelid, take a wireframe c4d.
http://i167.photobucket.com/albums/u142/raven7590/wireframe2.png
I added wireframe to both upper corners and the middle, and Ill just show you where I placed mine since it doesn't really matter. All my wireframe layers I placed on "Multiply" and lowered opacity to 50% on most of them.
Alright now we move on to the lower half of the sig. Get out another c4d, or use the same one as the top, it's up to you. I used this one, and lowered its size to 2500px.
http://i167.photobucket.com/albums/u142/raven7590/1diff.png
Using this part,
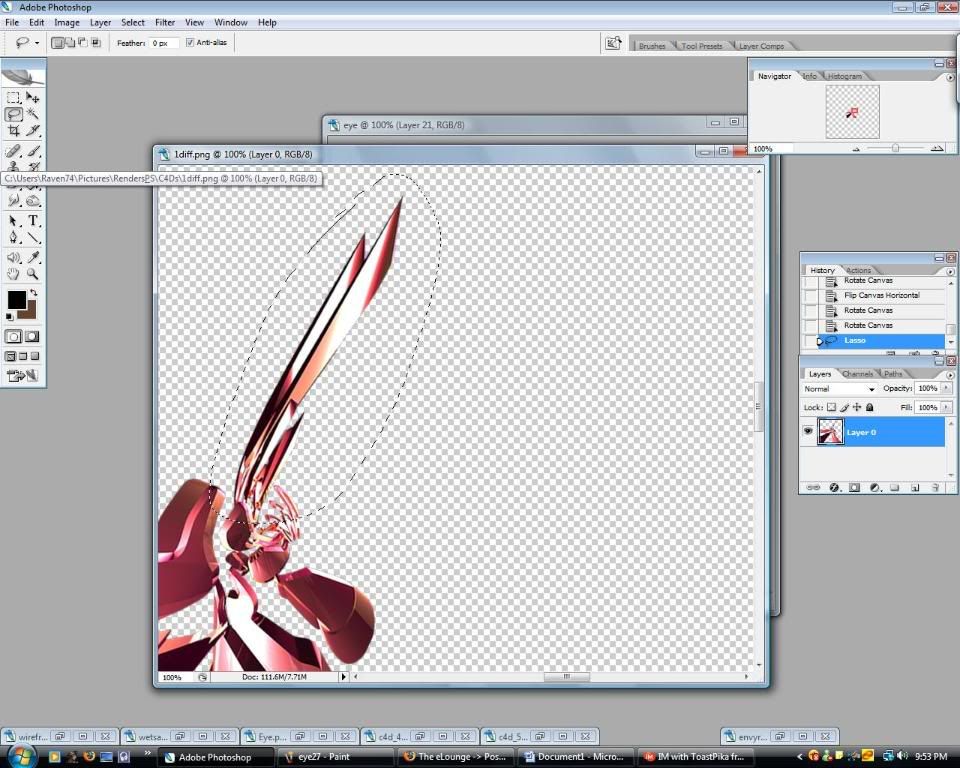
I rotated it to fit the lower left eyelid. It was really bright after desaturating it so I used a 300px black brush and brushed outside the corner a bit so it wouldn't be so bright.
I did the same to the other side, and lowered both their opacity's to 90%.
Now take the same c4d we used before for the upper eyelids, and use it to add more detail and fill in the bottom middle section. Erase the bits you don't like. Do the same thing to the other side.
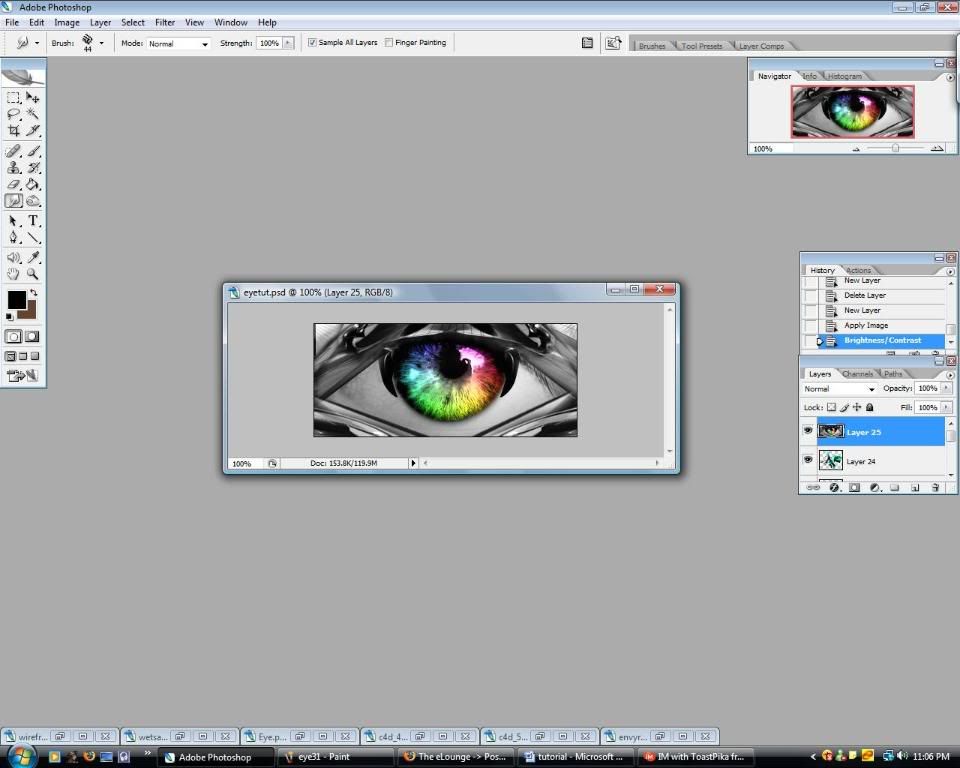
Then make a new layer, (CTRL + ALT + N) apply image (Image > Apply Image) and then raise the brightness and contrast. (Image > Adjustments > Brightness/Contrast) I raised both by 15.
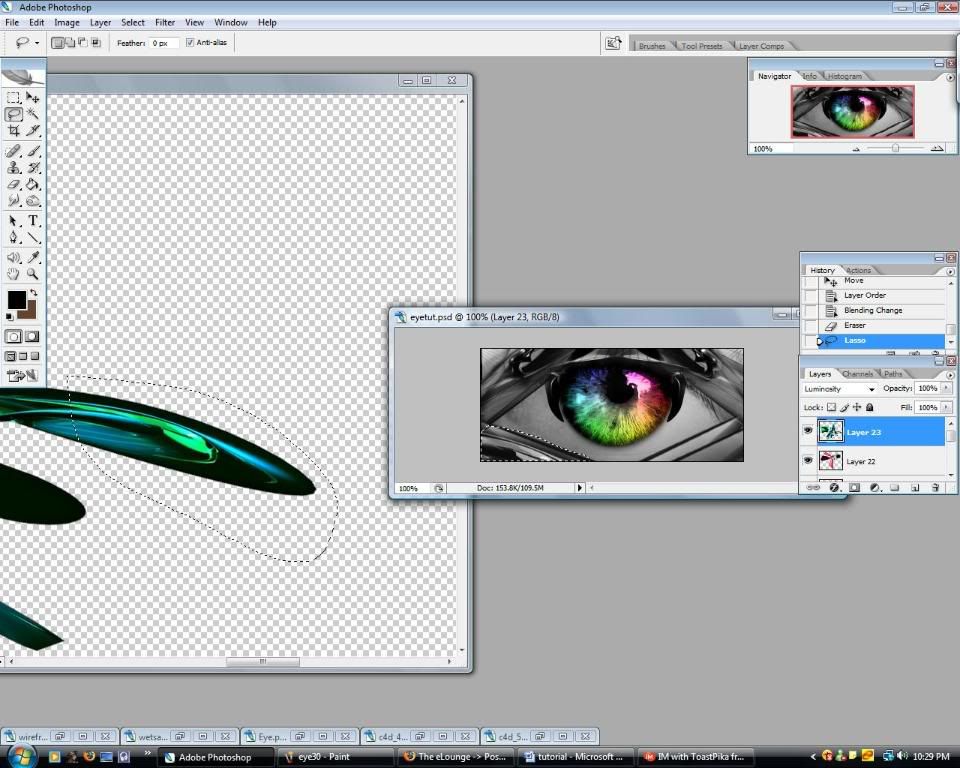
Alright now that we have both eyelids done, lets work on the liquid.
Were going to be using these C4D's.
http://i167.photobucket.com/albums/u142/raven7590/c4d_5.png
http://i167.photobucket.com/albums/u142/raven7590/c4d_4.png
Alright because these aren't rendered, your going to be erasing a lot and having to cut out stuff frequently. If you have a better idea, implement it here.
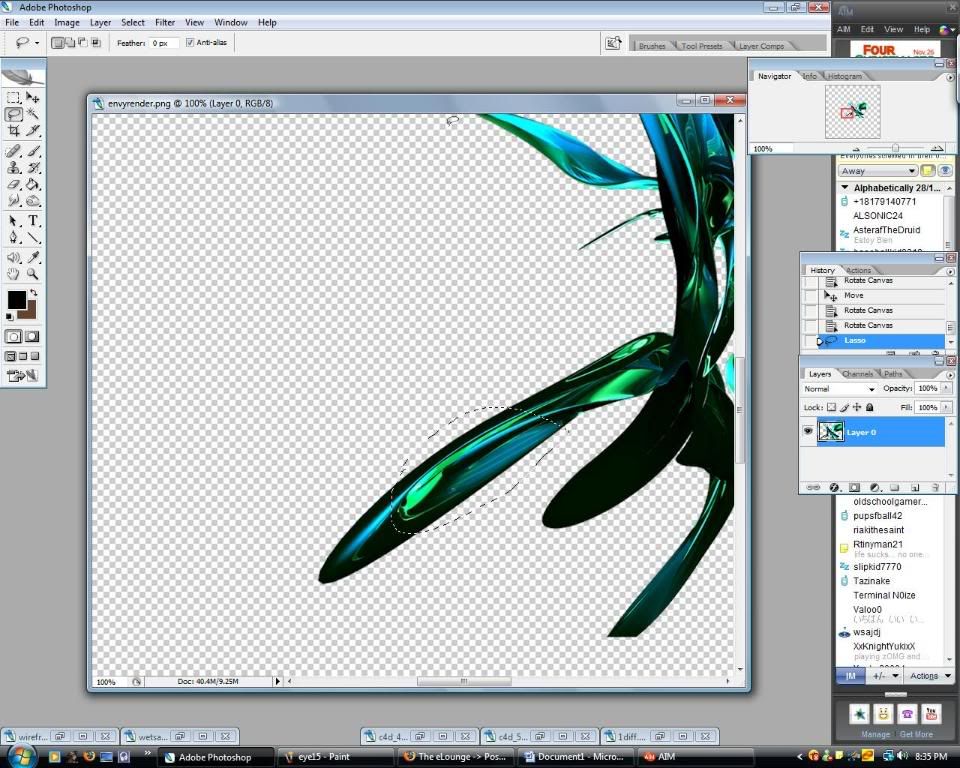
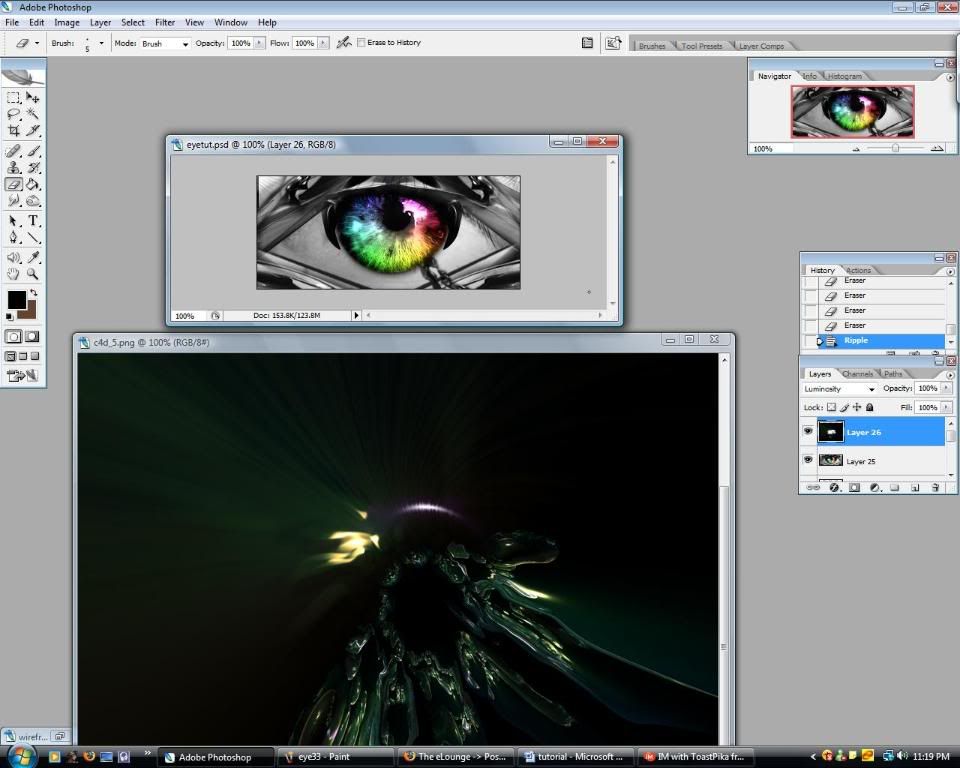
First take this c4d,
http://i167.photobucket.com/albums/u142/raven7590/c4d_5.png
and move it onto your sig and erase what you want, this is all really up to how good you are at erasing and using the same thing over.
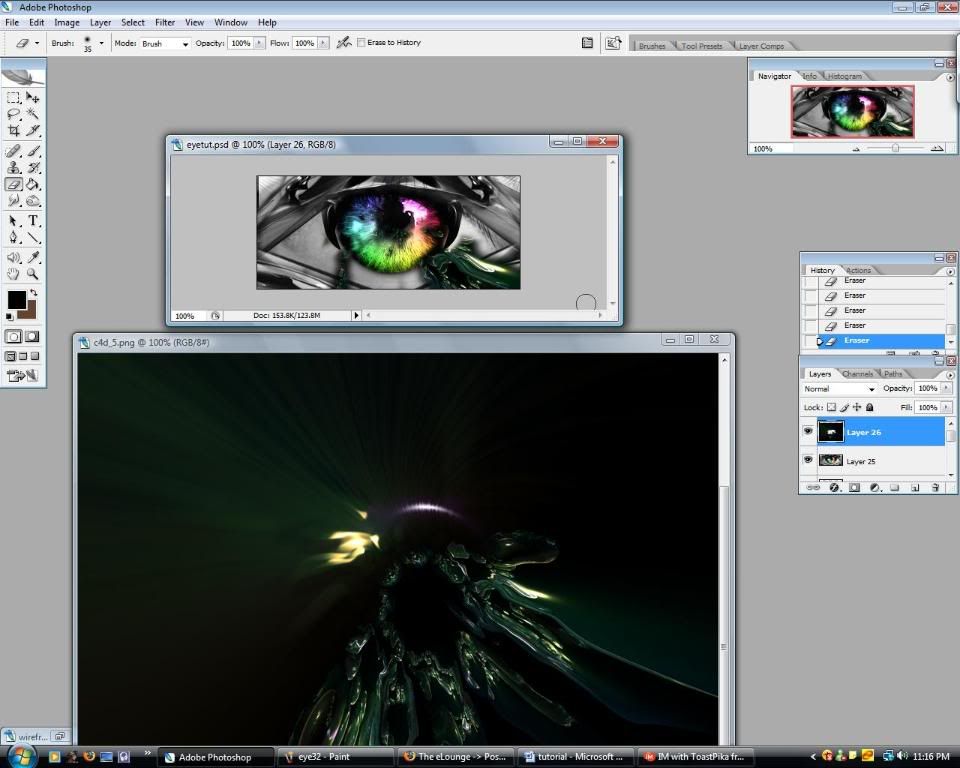
After I desaturated, edited it down a bit more and used a ripple filter on it (Filter > Distort > Ripple) It turned out like this.
I kept doing this using various rotations of the C4D and it turned out like this.

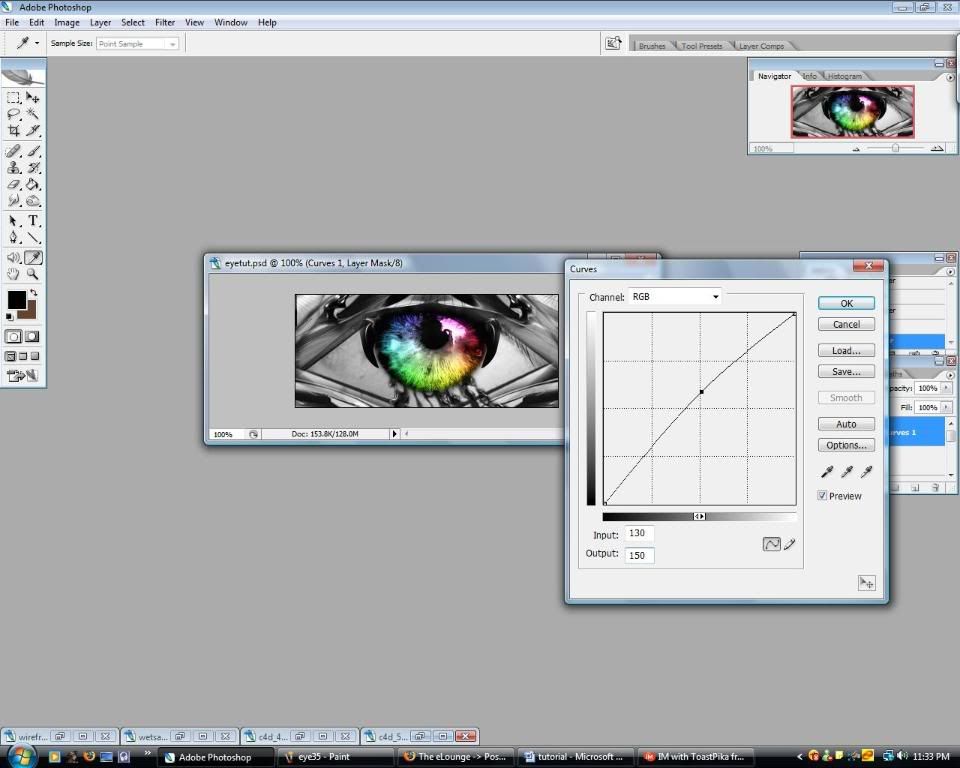
Time for some touching up.
I did a curves adjustment layer.
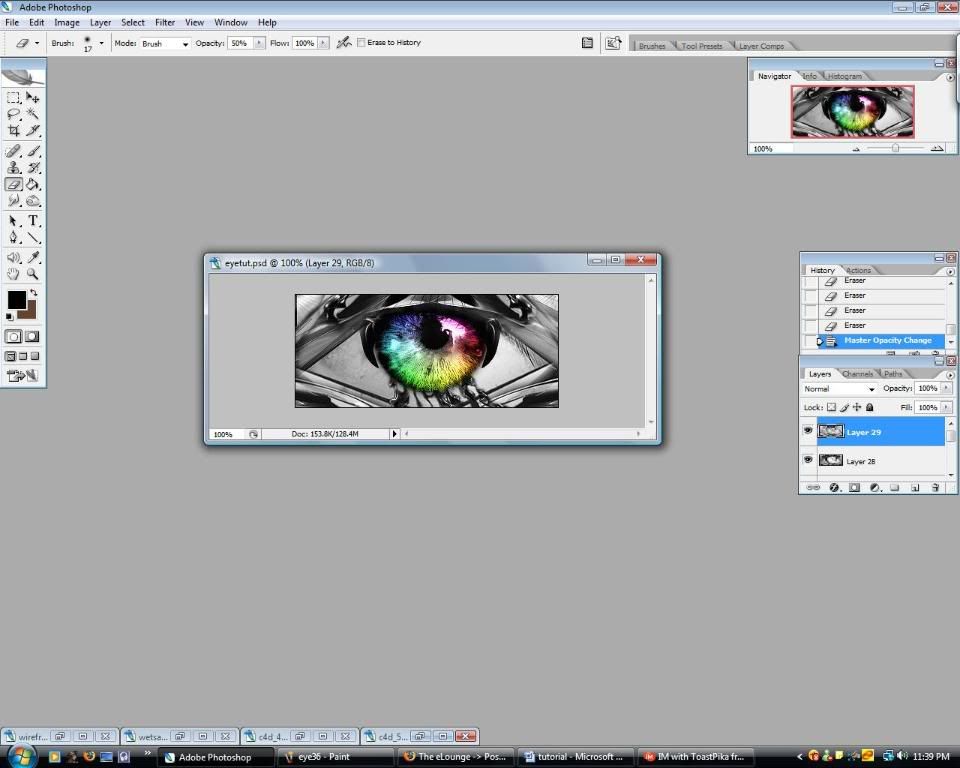
Now make a new layer (Image > Apply Image) then (Filter > Blur > Blur) and (Filter > Blur > Blur) again. Erase around the iris and anything that looks too blurry to you and lower the opacity to 50%.
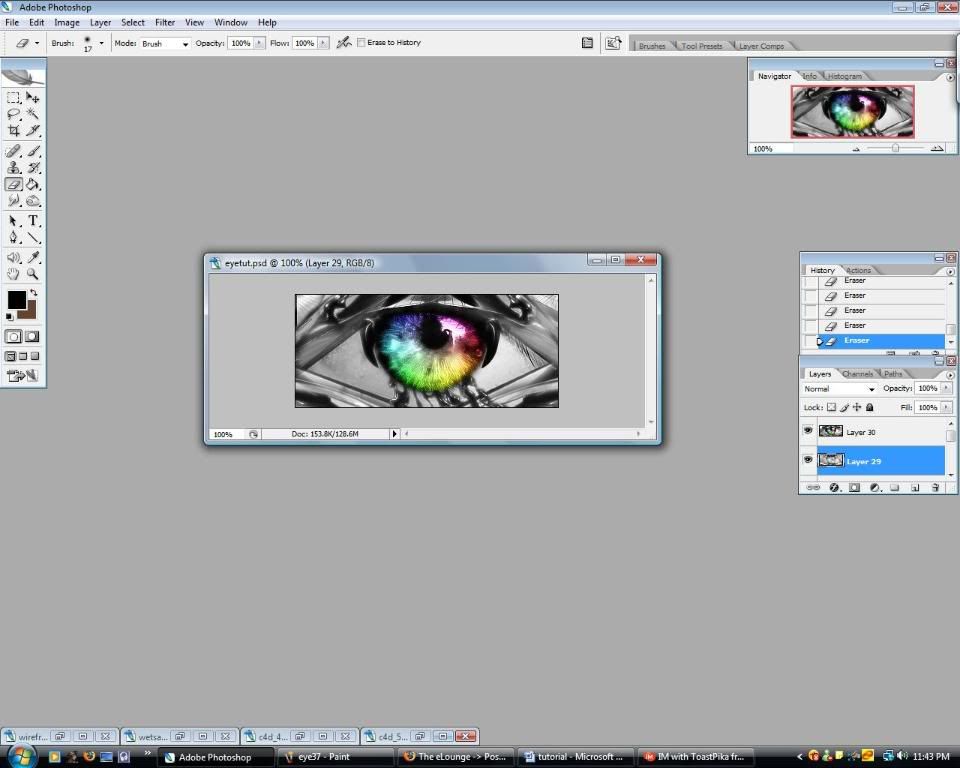
Then apply image on a new layer again, but this time (Filter > Sharpen > Sharpen) twice. Erase anything that's too pixely and lower opacity if need be.
Apply image one more time on a new layer and (Filter > Blur > Gaussian Blur) on 2.0 Set this layer to Lighten and lower opacity to 80%
Add a thin black or white boarder and your done!